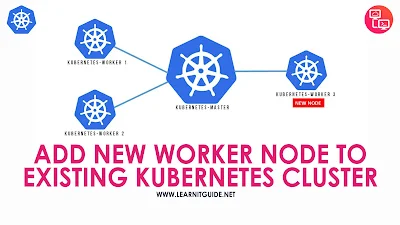
This post will show you how to add new worker nodes to existing kubernetes cluster without disturbing running application pods.If you are new to kubernetes and want to learn about kubernetes from basics, Refer the below links to understand this topic from basics and also you can checkout our all tutorial videos on YouTube for free.
What is Kubernetes - Learn Kubernetes from Basics
How to Install Kubernetes on Linux (RedHat / CentOS)
How to Install Kubernetes On Ubuntu 16.04 LTS
How to Create Kubernetes Deployment, Services & Pods Using Kubectl
How to Create Kubernetes YAML for Deployment, Service & Pods
Kubernetes Volumes Explained with Examples
Kubernetes Persistent Volumes and Claims Explained
1. A New Node with Minimum 2 CPU's with 4Gb Memory is required. Operating system should be installed and ready for the setup, i used Ubuntu 16.04 LTS - 64 Bit.
2. Make sure kubernetes master and new worker node is reachable between each other.
3. Kubernetes doesn't support "Swap". So Disable Swap on new node using below command and also to make it permanent comment out the swap entry in /etc/fstab file.
sudo swapoff -a
4. Internet must be enabled on new node, because required packages will be downloaded from official repository.
Get the Joining Token first from Kubernetes Master Node
Log in to Kubernetes Master node and get the joining token as below.user1@kubernetes-master:~$ kubeadm token list
If no join token is available, generate new join token using kubeadm command.
user1@kubernetes-master:~$ kubeadm token create --print-join-command
W0331 13:10:57.055398 12062 configset.go:202] WARNING: kubeadm cannot validate component configs for API groups [kubelet.config.k8s.io kubeproxy.config.k8s.io]
kubeadm join 192.168.2.1:6443 --token jnnu6g.wqbmmc1l2xtdf40t --discovery-token-ca-cert-hash sha256:ce4c91f6f5442c8c8519cacd4673864f3ce5e466435a6f6ac9e877d1c831f6dc
user1@kubernetes-master:~$ kubeadm token list
TOKEN TTL EXPIRES USAGES DESCRIPTION EXTRA GROUPS
jnnu6g.wqbmmc1l2xtdf40t 23h 2020-04-01T13:10:57+05:30 authentication,signing <none> system:bootstrappers:kubeadm:default-node-token
Copy the token highlighted in yellow color to join the worker nodes and keep it aside.
On Worker Nodes, perform the below steps to join the worker nodes.
Update the Ubuntu Repositories and install basic tools like apt-transport-https, curl.
sudo apt-get update && sudo apt-get install -y apt-transport-https curl
Add the Kubernetes Signing Key on new worker nodes.
sudo curl -s https://packages.cloud.google.com/apt/doc/apt-key.gpg | sudo apt-key add -
Add kubernetes repository on new worker nodes.
sudo apt-add-repository "deb http://apt.kubernetes.io/ kubernetes-xenial main"
Install the below required packages on new worker nodes using apt-get command.
sudo apt-get update && sudo apt-get install -y kubelet kubeadm kubectl docker.io
Start and Enable the Docker service on new worker nodes.
sudo systemctl enable docker
Use the Joining token you have copied earlier to add the worker nodes.
user1@kubernetes-worker3:~$ sudo kubeadm join 192.168.2.1:6443 --token jnnu6g.wqbmmc1l2xtdf40t --discovery-token-ca-cert-hash sha256:ce4c91f6f5442c8c8519cacd4673864f3ce5e466435a6f6ac9e877d1c831f6dc
W0331 14:00:32.775291 7193 join.go:346] [preflight] WARNING: JoinControlPane.controlPlane settings will be ignored when control-plane flag is not set.
[preflight] Running pre-flight checks
[WARNING IsDockerSystemdCheck]: detected "cgroupfs" as the Docker cgroup driver. The recommended driver is "systemd". Please follow the guide at https://kubernetes.io/docs/setup/cri/
[preflight] Reading configuration from the cluster...
[preflight] FYI: You can look at this config file with 'kubectl -n kube-system get cm kubeadm-config -oyaml'
[kubelet-start] Downloading configuration for the kubelet from the "kubelet-config-1.18" ConfigMap in the kube-system namespace
[kubelet-start] Writing kubelet configuration to file "/var/lib/kubelet/config.yaml"
[kubelet-start] Writing kubelet environment file with flags to file "/var/lib/kubelet/kubeadm-flags.env"
[kubelet-start] Starting the kubelet
[kubelet-start] Waiting for the kubelet to perform the TLS Bootstrap...
This node has joined the cluster:
* Certificate signing request was sent to apiserver and a response was received.
* The Kubelet was informed of the new secure connection details.
Run 'kubectl get nodes' on the control-plane to see this node join the cluster.
user1@kubernetes-worker3:~$
Our new worker node is joined to the cluster successfully as per the above output. Lets login to Kubernetes master and confirm the node list.
On Kubernetes Master
Verify the list of nodes using kubectl command.user1@kubernetes-master:~$ kubectl get nodes
NAME STATUS ROLES AGE VERSION
kubernetes-master Ready master 71m v1.18.0
kubernetes-worker1 Ready <none> 69m v1.18.0
kubernetes-worker2 Ready <none> 69m v1.18.0
kubernetes-worker3 Ready <none> 59m v1.18.0
That's it, Above output shows our newly added worker nodes.
Hope you have got an idea How to Add New Worker Node to Existing Kubernetes Cluster.
Keep practicing and have fun. Leave your comments if any.
Also refer below articles and checkout all tutorial videos on youtube.
What is Kubernetes - Learn Kubernetes from Basics
How to Install Kubernetes on Linux (RedHat / CentOS)
How to Install Kubernetes On Ubuntu 16.04 LTS
How to Create Kubernetes Deployment, Services & Pods Using Kubectl
How to Create Kubernetes YAML for Deployment, Service & Pods
Kubernetes Volumes Explained with Examples
Kubernetes Persistent Volumes and Claims Explained
Keep practicing and have fun. Leave your comments if any.
Stay connected with us on social networking sites, Thank you.


0 تعليقات